5 Essential Tips for Creating Stunning Studio Portraits
Creating stunning studio portraits requires attention to detail and a solid understanding of your equipment and environment. Here are 5 essential tips to elevate your portrait photography:
- Lighting: Utilize softbox or umbrella lighting to achieve even and flattering illumination. Natural light can also be incorporated if positioned correctly.
- Backgrounds: Choose solid or subtle textured backgrounds that complement your subject. Experimenting with backdrops can make a significant difference in the overall composition. For more on background choices, check out Photography Tips.
- Posing: Guide your subjects into flattering poses that showcase their best features. Consider their body language and expressions to create a connection with the camera. Read more about effective posing techniques at Digital Photography School.
- Camera Settings: Familiarize yourself with your camera’s settings to achieve crisp and clear images. Experiment with aperture and shutter speed to manipulate depth of field and motion blur.
- Post-Processing: Editing your portraits can enhance colors and sharpness, allowing you to achieve a polished look. Utilize software like Adobe Lightroom or Photoshop to bring out the best in your images. For great editing tips, visit Adobe Lightroom.
Behind the Scenes: A Day in the Life of a Photo Studio
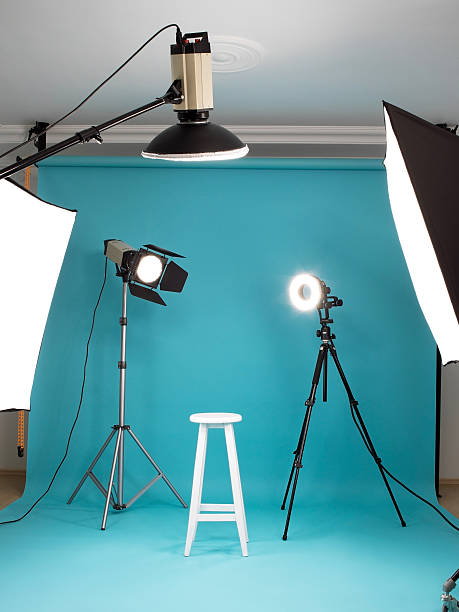
Welcome to our photo studio, where creativity meets organization! A typical day begins with preparation. Before any shoot, our team gathers to discuss the day's projects, ensuring that every detail is fine-tuned. As we set up the equipment, we check lighting, backgrounds, and props to achieve the best possible outcome for our clients. This phase is crucial, as it lays the foundation for a seamless shooting experience. Want to know more about the importance of preparation in photography? Check out this helpful resource.
Once everything is in place, the magic happens behind the lens. Each photoshoot presents its own unique challenges and opportunities for creativity. During the session, our photographers work closely with clients to capture their vision, guiding them through poses and angles. After the shoot, the team transitions to post-processing, where we carefully edit the images to ensure they meet our high standards. If you're interested in learning about the post-processing techniques we use, explore this excellent article for insights!
How to Choose the Right Lighting for Your Studio Photography
Choosing the right lighting for your studio photography is crucial for achieving that perfect shot. Start by considering the type of light you want to use: constant lights provide a consistent illumination, making it easier to see how shadows will affect your subject. In contrast, flash units can create more dramatic effects and have the benefit of freezing motion. Assess your photography style and the mood you want to convey—warm lights can add a cozy feel, while cooler tones often evoke a more professional vibe. For more detailed guidance on lighting types, visit Digital Photo Mentor.
Once you've established the type of lighting, the next step is to position it effectively. A classic setup involves using a key light to illuminate your subject and a fill light to soften shadows. Experiment with the angle and distance of your lights to see how they impact the image. Don't forget to consider using reflectors to bounce light and enhance your subject's features. For further tips on effective lighting techniques, explore Photography Talk.